L'automobile passion !!!
@ Version du 22 Mai 2019


JANNUARY 2014
26th January 2014
I start the day with an inspection of what Jeremy did last week – the pieces he’s painted look better than they were and his welding of the seat adjuster seems ok. I’ll give him 7 out of 10. Then it’s down to work - adjusting the radiator supports so that they comfortably clear the steering rack – with marking-out courtesy of a jar lid. We decide not to fit the radiator brackets until we can try a full mock-up with the fan, the oil cooler and the nose – space doesn’t look too tight at the moment but you never know. Jeremy gets on with putting the hubs back on after painting and then adjusting the interior panels so that they fit better. The original supply from MK is a bit slap-dash and the plastic they used looks like something from the interior of a 1980s car
– and not a good one at that - it really ain’t pretty. We are thinking about covering/wrapping these pieces once we’ve got the shapes right – we have a carbon look dash so a carbon wrap might be nice with the top of the transmission tunnel in the same colour as the body panels (if we can find a reasonable match). Alternatively aBurberry tartan would look chavtastick.
At the end of the day there is less bolted to the chassis than at the start of the day (as the front suspension is off for fitting the panels) but progress is being made.
We’ve got plenty of work we can get on with, and Laurent is going to MK in the week to hopefully get the last few pieces we need from them.
Now we’ve started with the side panels I see that when we were held up waiting for bits like brake pipes etc we could have been getting on with adjusting the panels to fit etc.
We would be less behind our original schedule but I think we’re still doing alright and I’d guess so long as we don’t have any big hold ups on bits we are going to be ready for May / June - of this year.
Finally I’m worried, we haven’t found any problems today!


After lunch of the French national dish – couscous (and a bottle of Fuller’s ESB), we make a start on the main side panel which needs adjustment to fit well and of course we need to cut the holes for the suspension and steering rack to pass through.
In the time honoured manner we make a cardboard template for marking-out the holes. We take inspiration for the form from a few internet images. We don’t want massive holes but we need to be sure that the full suspension travel will not cause interference with
the body panel.
The template takes quite a bit of time & we check that we can just
reverse the template to do both sides of the car with the one template – it looks like this will be ok.
We also drill holes for fixing the interior panel behind the seats and start putting in rivnuts to hold it in place along the top – I manage to strip the threads on the “rivnutter” mandrel so I’ll have to order a replacement (or 2) to continue.
I think we’ll just put bolts along the top and a couple near the bottom and use some black silicone to stick it elsewhere on the chassis and stop it vibrating.


19th January 2014
Duty calls elsewhere today so I place my confidence in Jeremy to do a bit of tidying up, painting the hubs, prop. shaft etc.
12th Jannuary
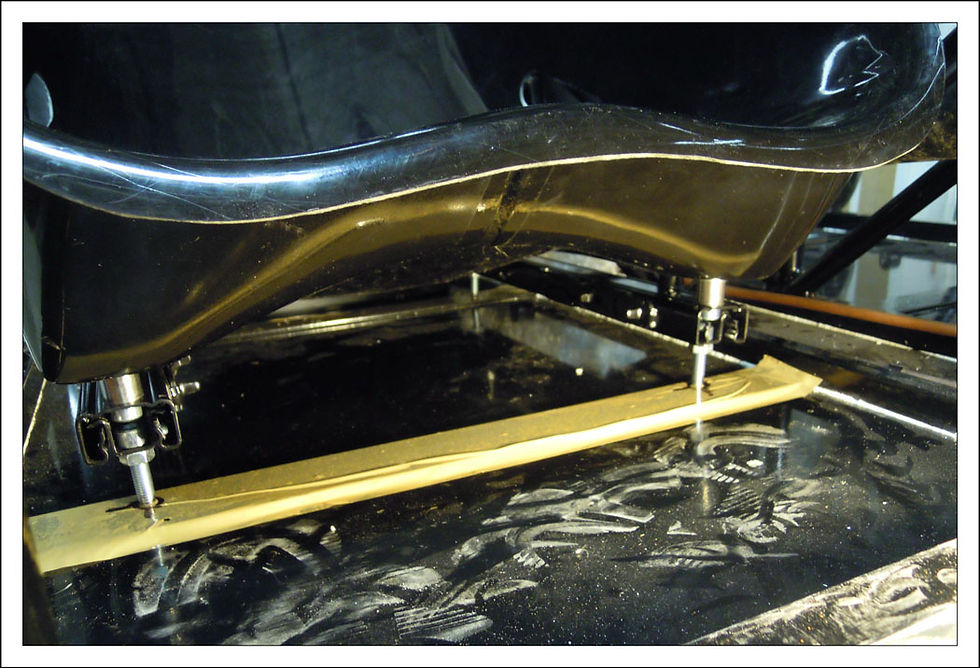
Getting ever closer to fitting the body panels (the bit I’m not really looking forwardto so much), but before we do that Jeremy puts the petrol tank in and I put the propshaft in position. We haven’t got the right bolts to bolt the shaft to the diff (assuming they’re metric it looks like they are MF thread rather than normal thread).I’m then tempted to start taking the front suspension off ready to start and prepare for fitting the side panel but I’m reminded that we need to do something with the seats too. So after a final session of head scratching we make a couple of the holes in the runners into slots & fix the runners to the seat using socket head cap-bolts & ‘Dimitri’ spacers. We think we should have just enough space to use similar bolts in the runners to fix them to the floor too & hopefully have enough access to get an Allen-key into the bolts for fixing to the floor (if that doesn’t work we’ll have to get the bolts welded to the rails).
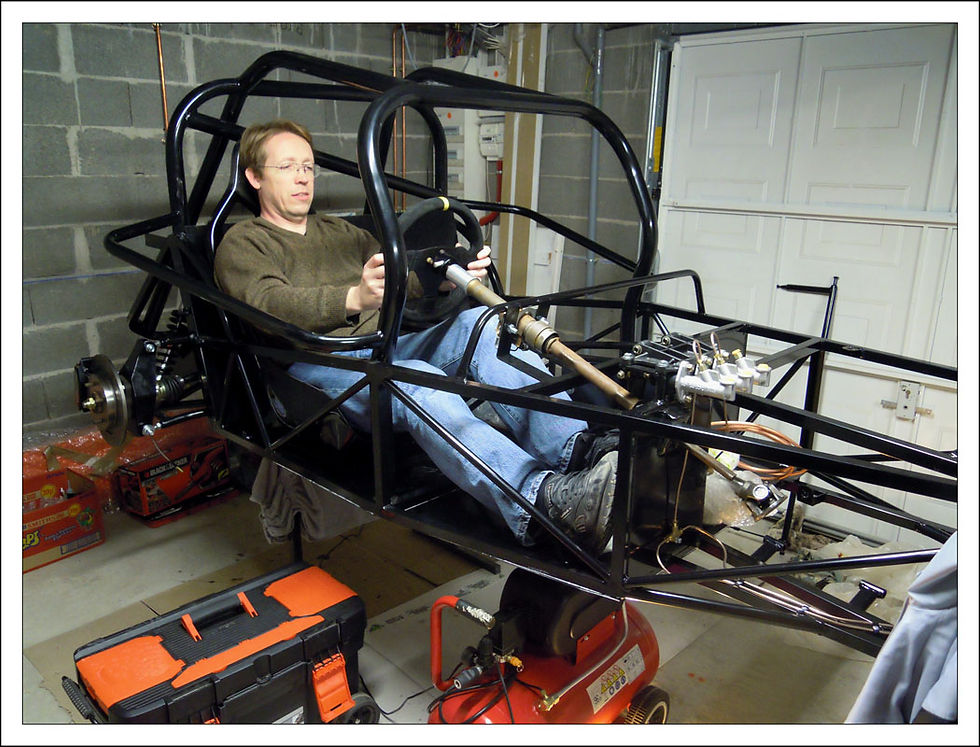
Before marking for drilling we place the seat in the car, put the steering column in
place and have a trial sit just to check positioning. We can’t be sure of the rake of the column nor the final height of the wheel as we haven’t got the column extension to connect it to the rack but it looks like Jeremy may have the steering wheel directly in his line of vision. We’ll have to check this later & see if there is anything we can do to avoid or minimise this. Maybe I’ll treat him to a booster cushion as it seems not to be a problem for me.
After taking the obligatory photos of each of us sitting in the car holding the steering wheel we mark up the floor & drill – we also drill for a couple of extra floor rivets which we’d not done until we could see where the seat rails would be. After drilling we try the seat again and are delighted that holes & bolts match up – we’ll need shorter bolts for final fixing. Jeremy also cut the seat runner adjustment handle in half as it is narrower than the width of the seat! Fortunately it’s a tube so we’ll find a suitable bar & weld or glue it in so that it goes the full width of the seat and we can adjust it.
The passenger seat is easier as there is no seat rail it just bolts to the floor so again we mark up and drill but we can’t put in the proper position as we need to get some taller ‘Dimitri’ spacers made (3.5 - 4cm).
We are both rather pleased with today’s work especially the driver’s seat. To finish up for the day we note the few bits we need to get - shorter bolts for the seats, spacers & some big washers for the hub nuts (as the nuts have a smaller outside diameter the contact surface with the hub carrier looks too small so another job for Dimitri – at this rate he’s going to want shares in the car!).


7th January
Called J&R (helpful as ever) regarding threads on stub shafts & found out that … “I’m a dinosaur!” Left hand threads haven’t been used on hubs since the 1980s. So good news for the build & bad news for me coz I’m old! God knows how I’ll get on with a modern engine with electronic bits & injection and all!


04th Jannuary
Looking forward to good progress as we should now have the parts necessary for the next steps. Jeremy starts on completing the rear brake pipes (now that we’ve got the right connectors). I start by putting the brake light switch in place (adapter collected in UK) & then assembling the stub shafts onto the drive shafts - looking at them I notice the hub nuts on the old Sierra ones are more solid with a larger outside diameter than the new ones so we decide to use the old ones.
We then look at fixing the diff & notice that the M12 socket head cap bolts don’t seat well in the slot in the diff. casing. They might pull down when tightened but we don’t want to risk splitting the casing – the result is our first trip of the year to the DIY store to buy a Dremmel – a purchase we expected to have to make at some stage anyway.
Once back Jeremy got to fettling the diff. whilst I got on with routing for the fuel pipe, leaving plenty of spare pipe at the back for easy connection to the fuel tank. The rest of the tube is left in the engine bay as we don’t have the engine, so we’ve no idea where the pipe needs to go to – I think we’ll want to add an in-line filter too. To route the pipe we put the fuel tank in place, after sticking some insulation on the chassis where the tank will sit. The tank will be held with rivnuts but we leave it off until we’ve got the diff., drive shafts and all the suspension assembled.
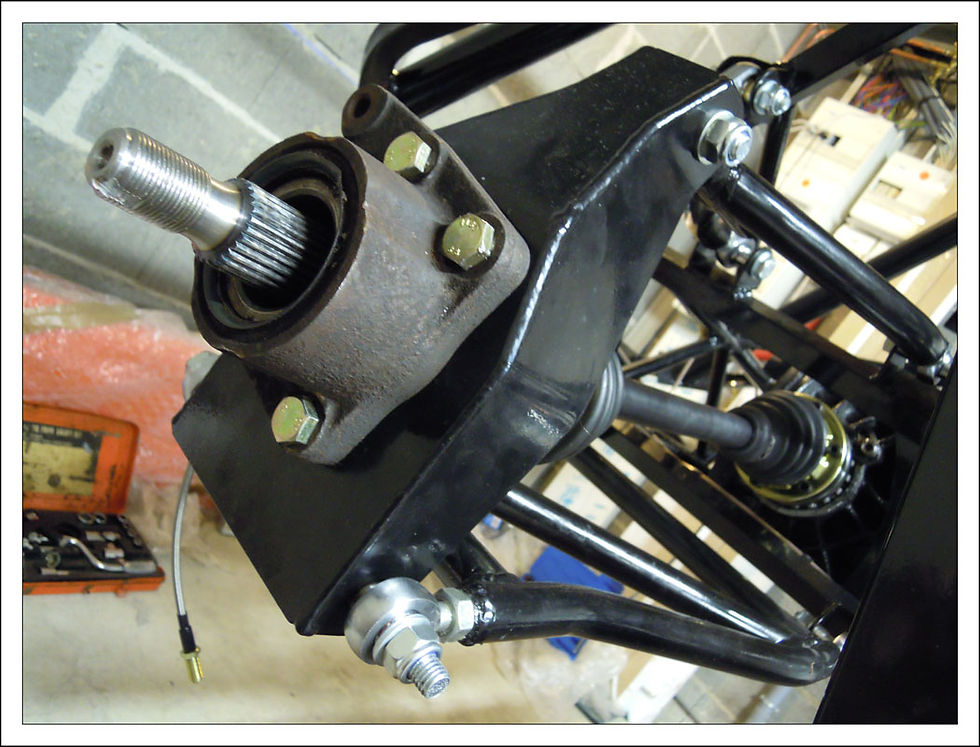
We’re now ready to put the diff. in the chassis – we first jack it up towards the chassis so that one of us can then lift it from above, the other pushes from below and both of us try to get the bolts in. We then get the drive shafts in place and bolted to the diff. and we trial fit the hubs – which we have to clean up as they aren’t looking very pretty. We can now fit the hub carriers properly as Jeremy got an assortment of spacers made by cousin Dimitri (hoorah for cousins with useful jobs) – the first are used between the hub carrier and the rod end bearing – it looks so much better than packing with washers.
In doing the trial fit I go as far as trying the old hub nuts on the new stub shafts and
this is where we find the “problème du jour” (there is always one) ... both the new
stub shafts have right-hand threads whereas the old ones have one right-hand and
one left-hand (which seems to make sense to me) - the ‘F’ word is liberally used. I’ll
have to take this up with J&R next week.
Despite this set back we are feeling so pleased with ourselves that we have another
look at the seats. This confirms that the holes in the seat, the seat runners do not line up. However we’ve got a few ideas about how we might deal with this – a job for next time.


DECEMBER 2013
31st December
The last job of the year once back home in Paris was for me to assemble the new drive shafts. This was easier than I thought it would be - once I went and got some circlip pliers, that is. We just need to find a tool for tightening the boot clips (or will we use cable ties ?). I also picked up some nuts and bolts for
the diff and the rear hub/hub carriers from Bricovis (near Cergy – good service and they have nuts, bolts, rivets, rivnuts and all sorts of other fastners with choices of materials, finishes, fully threaded, partially threaded etc - a useful address for any builders in France).
So … Happy new year and here’s hoping that we’ll be bombing around the tracks of France before the end of the year (so much for our original planning which was foolishly based on having all the bits necessary to build right from the start!).
My new year resolution will be to get Jeremy hooked on that great British tradition of continuously drinking tea whilst working on the car.
28th December
During my trip back to UK I popped in to Demon Tweeks in Wrexham – it’s a brilliant place, nice people. I got the few bits and pieces we needed to complete the brake circuits. I sorted out a sex problem – they’d mixed up males with females for the metric aeroquip hose connectors I’d re-ordered. I made the most of the occasion to rather optimistically get myself a pair of gloves and a helmet – hope it won’t bring us bad luck.
I also brought back the power file so we’ve just about run out of excuses to not look at how to fit the side panels.
22nd December
Got as far as we could on the brakes. The diff is ready to go in, after
we understood that we had to knock the sleeve out to get M12 cap bolts in – though of course we haven’t got the bolts.
We also had a look at how to put the seats in – it can’t be difficult can it ? What
a surprise, the holes in the seat don’t match up with the seat runners (we need
runners for adjustment due to Jeremy being a short-arse or to be more politically
correct ‘vertically challenged’). The runners are also too short to bridge the gap
between the supports on the chassis. Time to hit the net again to look at options on
different runners etc.
Finally we had a look at how the anti-roll bars fit – not very obvious and we haven’t
found any images on the net though we think we’ve got it partially sussed (though we don’t have all the bits, as usual). We’ll take some photos & ask MK to confirm (and send us the rest of the parts).
Other main achievements of the day were nearly putting a dent in the side intrusion
bar where Jeremy hit it with his head … and first blood of the build was shed when I
made a hole in my finger.
That’ll be it until after the holidays. We’ve made some progress but Jeremy still
worries me when he asks which way to turn a nut to tighten or loosen it !


December 15th
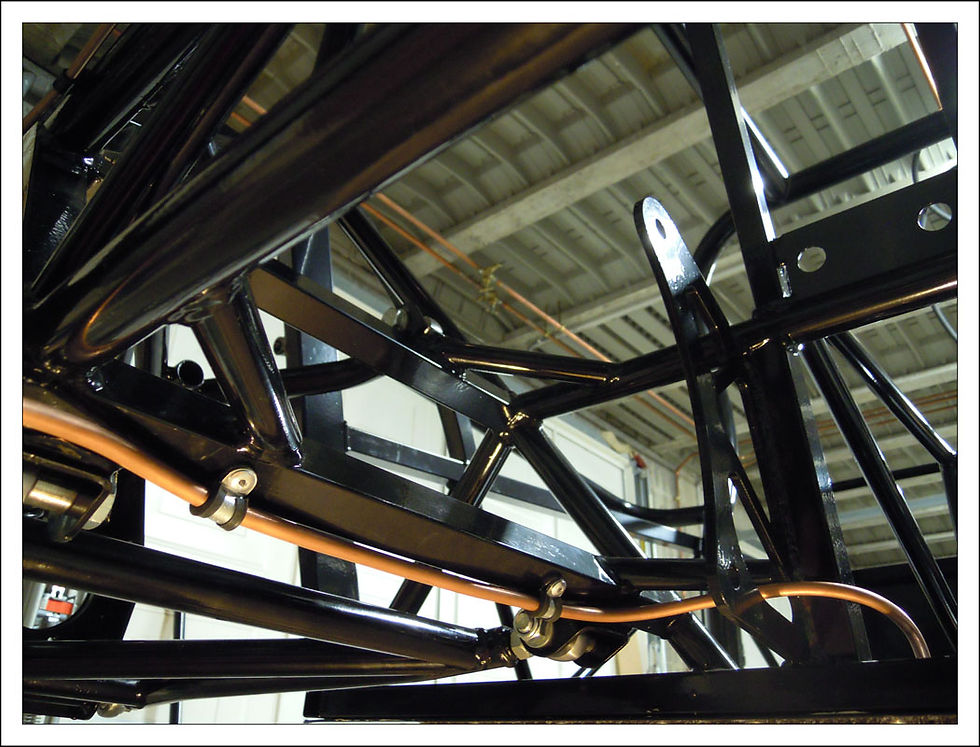
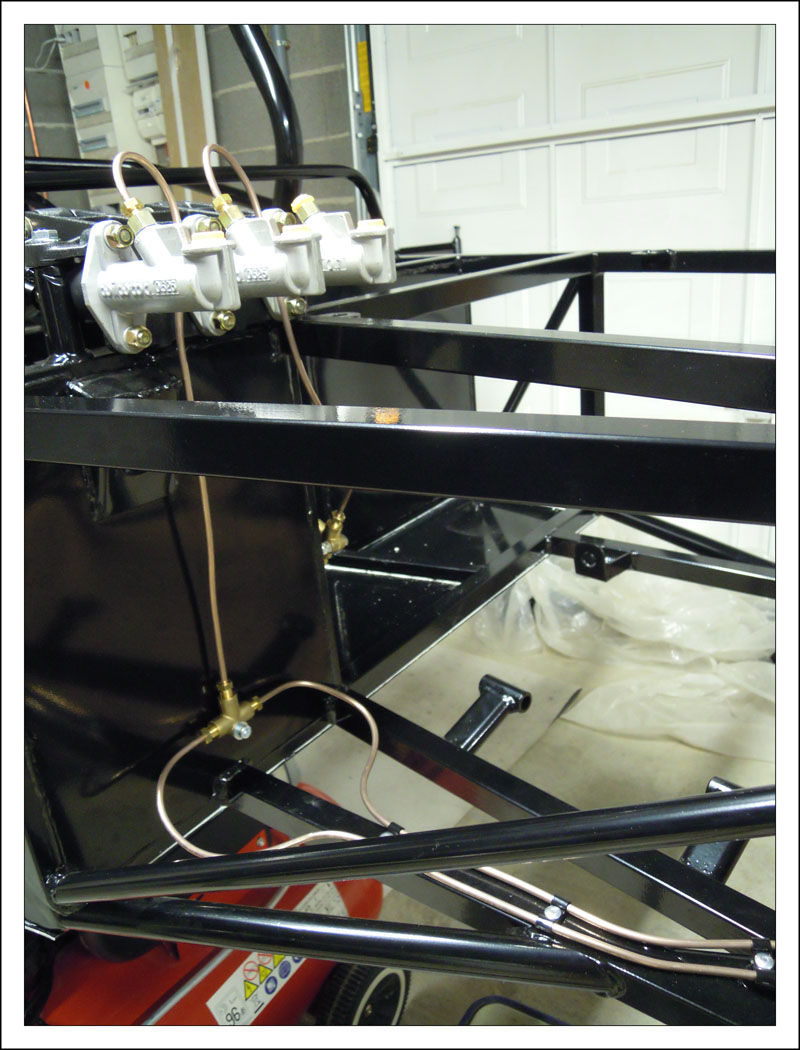
Having received the order from Demon Tweeks we were ready to start making the brake pipes – we looked at various stuff on the Net for routing ideas before deciding what we would try and do. We quickly discovered some bits that didn’t fit - connectors to aeroquip hoses needed to be M10 and I’d assumed they would be UNF as the callipers are UNF …ho-hum & nice excuse to go and visit Demon Tweeks when I’m back in the UK.
The 25ft of brake pipe we’d ordered also looks a bit short to do the whole car and it certainly doesn’t leave much scope for errors. We’re sure to make some, neither of us have made brake pipes before.
In the end making the pipes isn’t so tricky - after a couple of tube cutting and flaring tests Jeremy takes care of cutting and flaring – he seems quite happy doing that whilst I took care of drilling for the p-clips and stuff. It could be tricky getting the lengths just right with the bends and so on but we sussed out that when arriving at a Tee or pressure switch or something it’s best to do the pipe before trying to fix the final position for fixing to the chassis.
The first of the tighter 180° bends up to the Willwood master cylinder was considered ‘sub-optimal’ (a bit crap) so we re-did that one. Otherwise we didn’t end up scrapping anything else. After much careful consideration we decided to order new drive shafts from J&R with delivery in the UK (for cheaper transport - I’ll collect them over the holidays). We came to this decision for the reason that we can’t be arsed to change the boots and refurbish the CV joints – new ones came in at £125 including rapid delivery. The order and delivery service from J&R was impeccable.


NOVEMBER 2013
OCTOBER 2013
Should have been a busy month with lots of progress, there are two long weekends
off in France but we’re waiting on MK for pieces so the frustrations grows. Even
simple stuff that can readily be bought off the net isn’t coming through but as we paid for a full kit we’d really like to get a full kit.
We hassle Laurent and contact MK direct and in the end we arrange with Laurent
that we buy some of what we need directly off the net and we’ll sort out the money
later. Plus more kit is promised from MK at the forthcoming trackday at Le Mans.
Buying for ourselves means lots of hours spent on the net first finding out that there
just aren’t many suppliers of car bits in France, at least not bits like we’re looking
for - so we end up ordering what we think we need for the brake lines from Demon
Tweeks – not the cheapest but the one place where they had everything we were
looking for and I knew them from a long, long time ago. Their ordering and delivery
service were excellent.
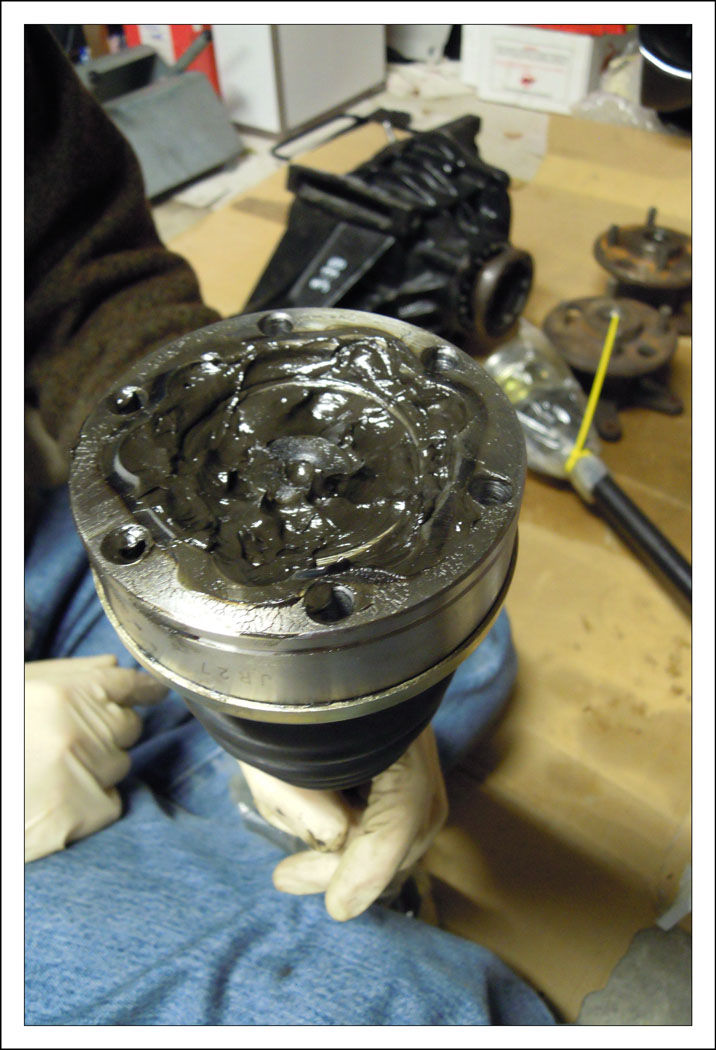
MK made the trip down to Le Mans and as Jeremy was due to take his Lotus there
too he was able to collect more bits like the diff and some drive shafts which, on
closer inspection when he got them home, were really rather ropy with boots split
wide open evidence of some expert DIY with one boot having been replaced and
held in place with cable ties – who knows, it might work but it looks like a bodge too
far for me. We’d have to have a look how to refurbish the drive shafts.
With Christmas coming and with it a trip back to the UK I also ordered a power file
£35 compared with €99 if bought in France !


October 20th
On his own – he’d received the front disks from Laurent. This might be considered a
little foolhardy on my part to leave him alone given that he regularly asks me which
way to turn the spanner to tighten & loosen but we’ll have to take it all apart again forfitting the side panels - so not too much risk involved.
Not much to do due to lack of parts so I left Jeremy to do a bit of fiddling


October 13th
Collect the rest of the bits necessary to assemble the suspension. MK were making a
delivery to Laurent in Tilloy and I planned to call in on my way home from a trip back
to the UK. Alas I was rather disappointed to arrive chez Laurent to find that very little
kit had been delivered ball joints which would allow us to get a bit further a fuel pump
and a few other bits and pieces (though we were not disappointed by the hospitality
chez Laurent).
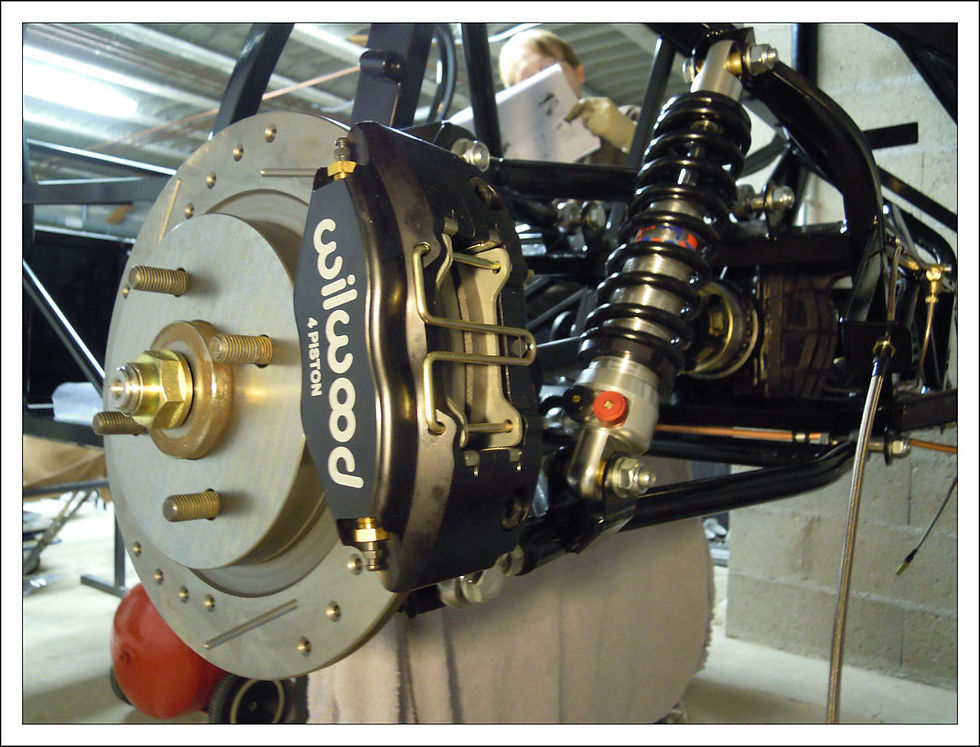
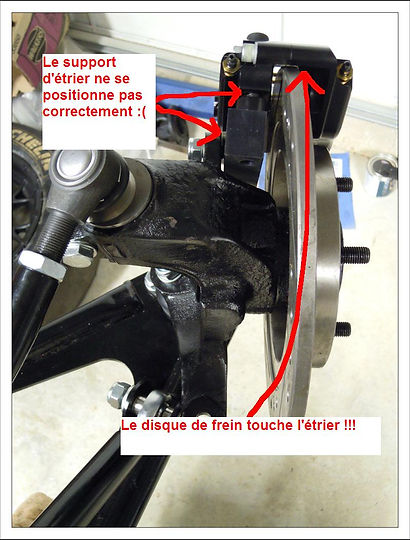
Anyway we thought we had what we needed to get the front suspension, hub and
disk together this went fine until we tried to put the brake calliper over the disk. We
tried all the bits in all the ways we could imagine, we even thought to check that
front and rear disks were the same – they were but that is where the problem was
– they shouldn’t be! Fortunately Jeremy thought to check back with Laurent and
we discovered that we’d got 4 rear disks and he’d got 4 front disks for the kit he’d
received at the same time.
If Jeremy hadn’t thought to check this I’d probably still be there trying to put back disks on the front. A great example of the advantage of not as the first delivery was rather incomplete we were hoping to be able to doing the build on your own (at least not the first).
So frustration again but at least it wasn’t just us being too stupid to work things out.
October 5th
I started to get some comments from colleagues about the project. I work mostly with engineers so they find the project interesting but tend to think of building your own car as just one more British eccentricity.
– voilà time to start the serious stuff & rivet the floor to the chassis by first clamping, marking out the floor and then flipping it over before re-clamping to the chassis for drilling the floor & chassis. Then riveting it after putting down a bead of silicone. Things went surprisingly well – we only had one hole in the floor that didn’t line up with the chassis (it wasn’t symmetrical as we had supposed). Still the extra hole is ideal for drainage. The only other schoolboy error was mine - I bought white silicone for the black chassis & floor so the excess that was squeezed out here and there is rather visible (I’ll know better next time!).
We each did part of the drilling and part of the riveting so if one of us finds our arse dragging along the floor one day we can always blame the other.
After lunch we put the chassis back up the right way, it appeared to have put a lot of weight on whilst were having lunch, and we decided to have a serious look at how the suspension goes together – despite not having all the bits, nor any useful instructions it was satisfying to see the thing starting to take shape.
Despite the frustration of not having all the bits it was still a very satisfying day.
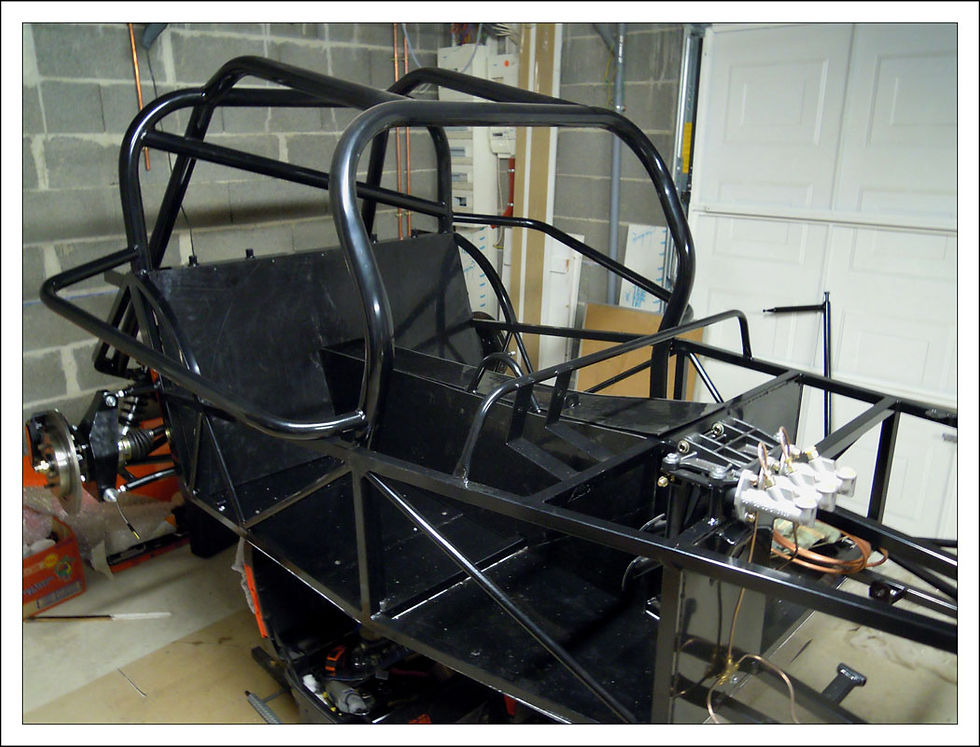
 Attention Mike tu es surveillé :) |  Des petits trous, des petits trous, encore des petits trous !!! |  En voilà un homme bien consciencieux ;) |
|---|---|---|
 Le châssis retourné a été percé. Un joint de silicone a été appliqué afin d'éviter les vibrations. |  TESTUn homme correctement outillé en vaut deux. Dans notre cas çà prend tout son sens. En effet, une riveteuse pneumatique c'est magique !!! |  Initiation à la technique de la riveteuse |
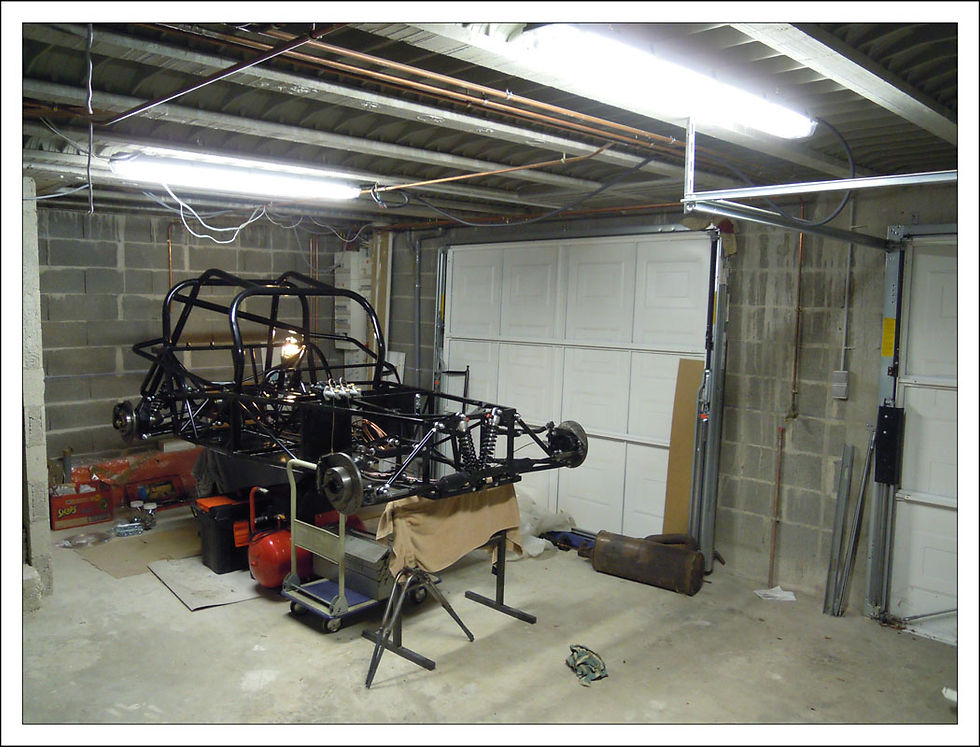
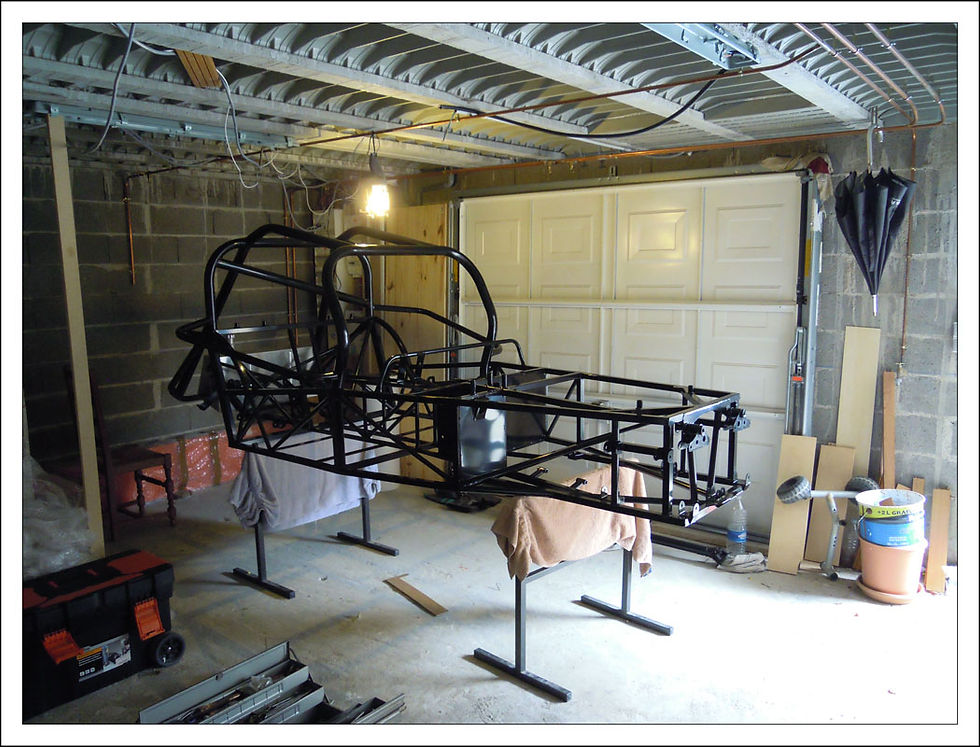
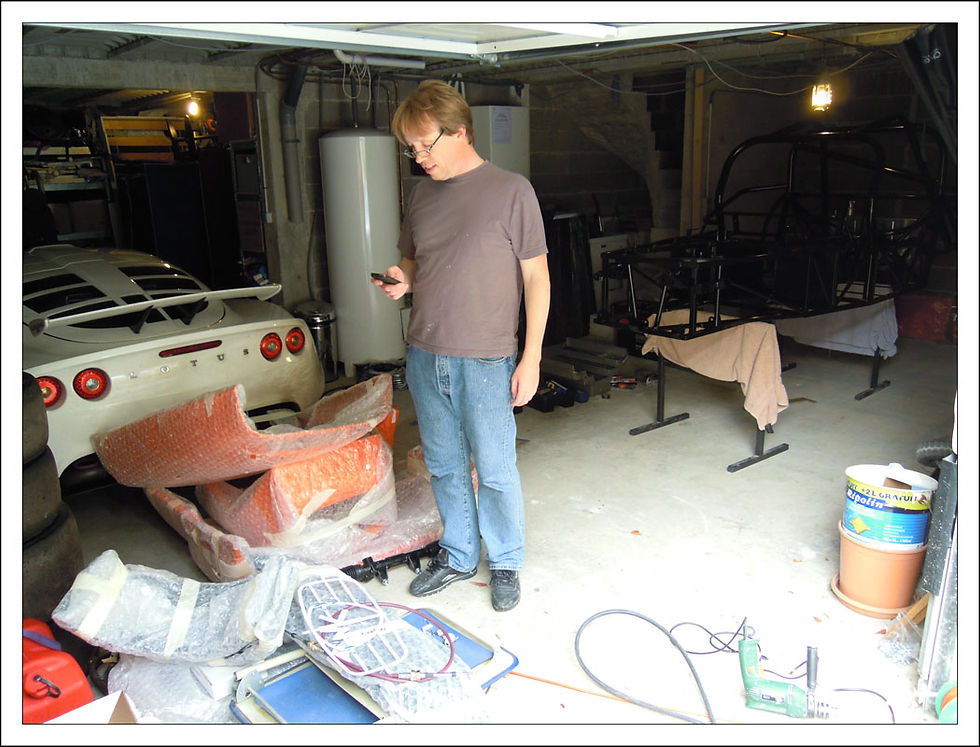
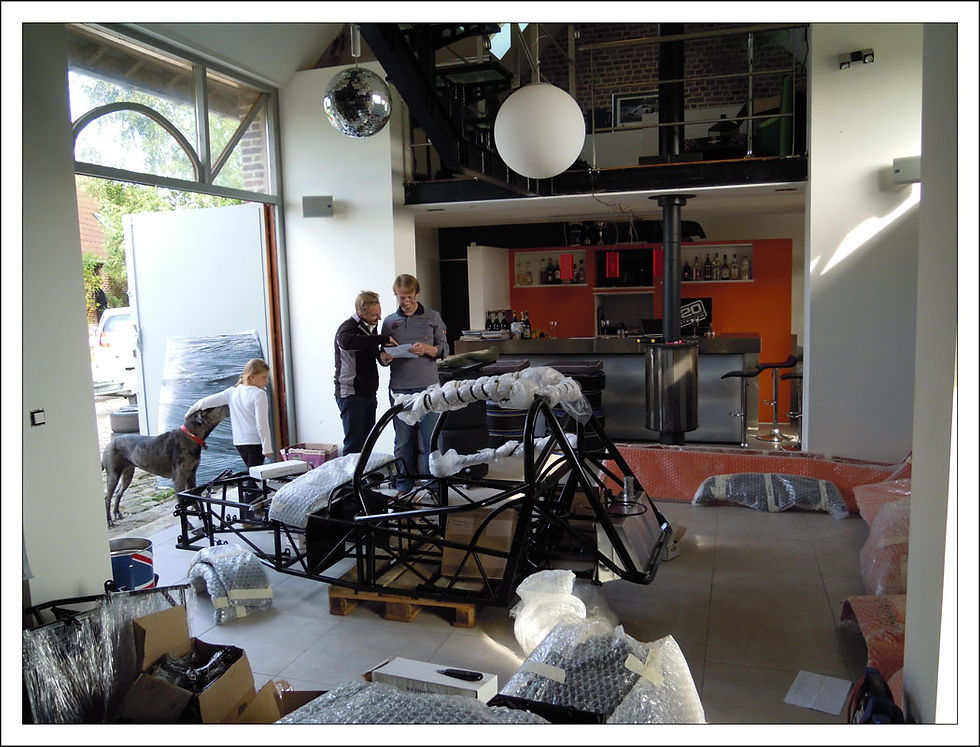
 Le plancher définitivement riveté, chouette :) |  Photo une fois le première étape finie |  Mon garage est devenu un atelier de mécanique automobile. Même si ce n'est pas pratique et que c'est encombrant, çà a de l'allure !!! |
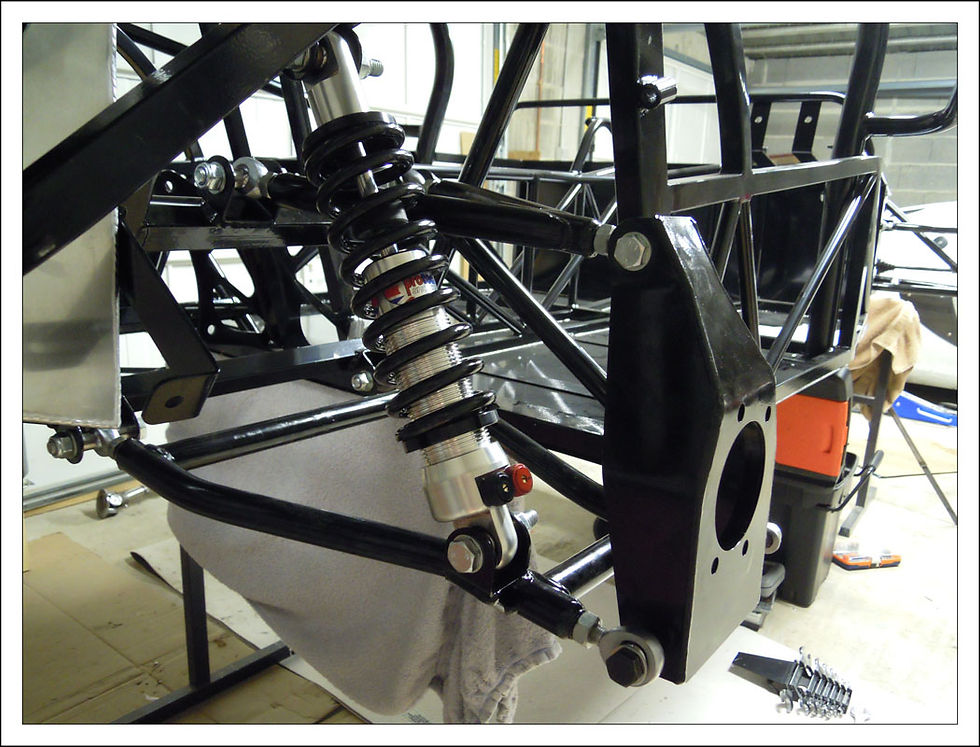
 Les rotules de suspension |  Une documentation d'installation, une vraie aide précieuse. Problème, elle n'est pas complète et les pièces que nous avons sont différentes. En gros, on ne peut pas trop s'y référer :( |
SEPTEMBER 2013
Sunday 29th
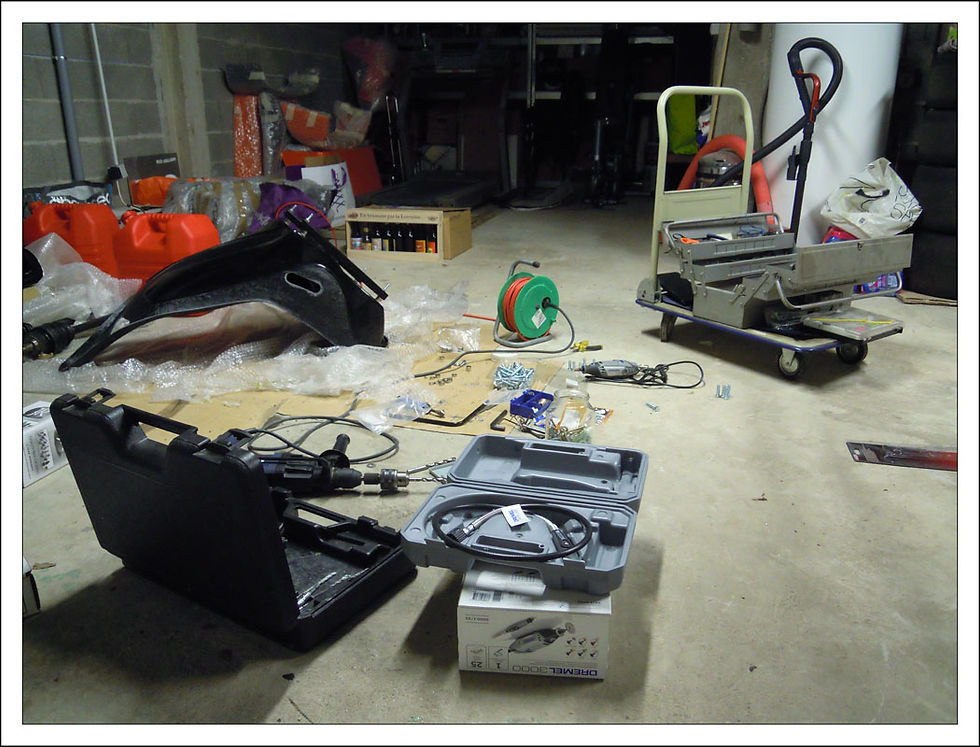
Between intensive sessions of looking at the bits spread around the garage and thinking “merde” it’s too late to change my mind now, we put up some
extra lighting in the garage and learned how to work the compressor and rivet gun we’d got hold of ready for the first step of fixing the floor to the chassis.
At this stage, despite being male, we would have liked to have read through the instructions but they follow the same philosophy as the car … they’re very light. Unlike the car, hopefully, they are not terribly useful. We also had a bit of a play with the suspension components to see how they might go together.
Finally we turned the chassis upside down on trestles ready to install the floor next time. A step Jeremy seemed rather worried about.


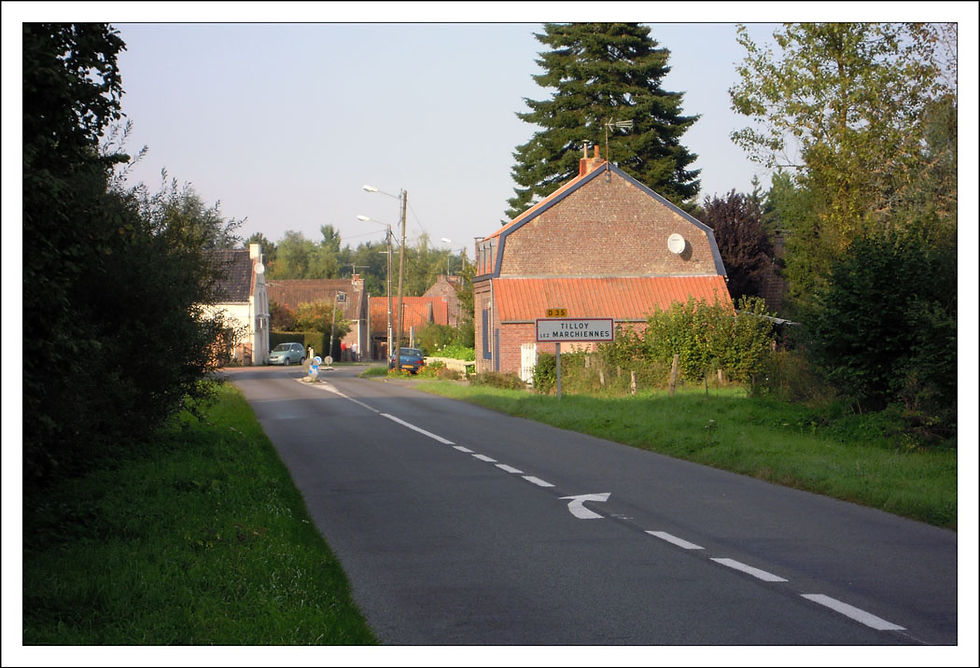
28th September
- a couple of weeks later than originally scheduled, Jeremy and Itook a trip up to Laurent at Tilloy Les Marchiennes to collect the first parts. We were expecting to collect everything except the engine and some ancillaries but when we got there we found only the chassis, the floor, some suspension parts, most of the panels and some slightly used 13” Compomotive wheels (thanks in particular to Laurent for finding the wheels as Compomotive had gone bust).
The excitement of getting some parts easily overcame the disappoint of not getting everything we expected and we were happy to get it on the trailer and in the back of Jeremy’s car. The chassis was not too difficult to move but the further you have to move it the heavier it gets.


JULLY 2013
We placed the order and arranged for the first delivery in September after the holidays (of course France is closed over July and August).
JUNE 2013
We were surprised that there isn’t a full listing of parts to build the car. However a couple of calls with Laurent at CML allowed us to finalise the spec. of what
we thought we wanted to do (though I will not be surprised if this evolves as we progress). The only difficult decision we faced was what colour to go for – we ended up going for an orange and black colour scheme.
The parts /options listing we had was mostly in French as were the conversations so it was a good opportunity for me to develop my French vocabulary, so that I would no longer have to try and describe bits by their function. Until now I hadn’t needed to know the French for LSD, drive shaft, track rod end bearing, ball joint, anti-roll bar and all the rest. At the same time Jeremy was improving his English (there is certainly room for improvement J).
With the spec finalised the budget was pretty much fixed and we decided to ease the cash-flow by splitting the delivery into 2 - with the engine to come later once we were sufficiently advanced to actually do something with it.
First Delivery
Kit Indy RR Arceau Cage Complet Uniball
Roues 13 pouces compomotive
Pneus Slick
Kit passage de vitesse batonrrr
Volant avec support amovible
Radiateur eau & huile en alu
Réservoir de 40L
Pont 3,3 LSD + Cardans + Transmission modifiée
Sièges baquet en fibre
Harnais large boucle
Rail de siège
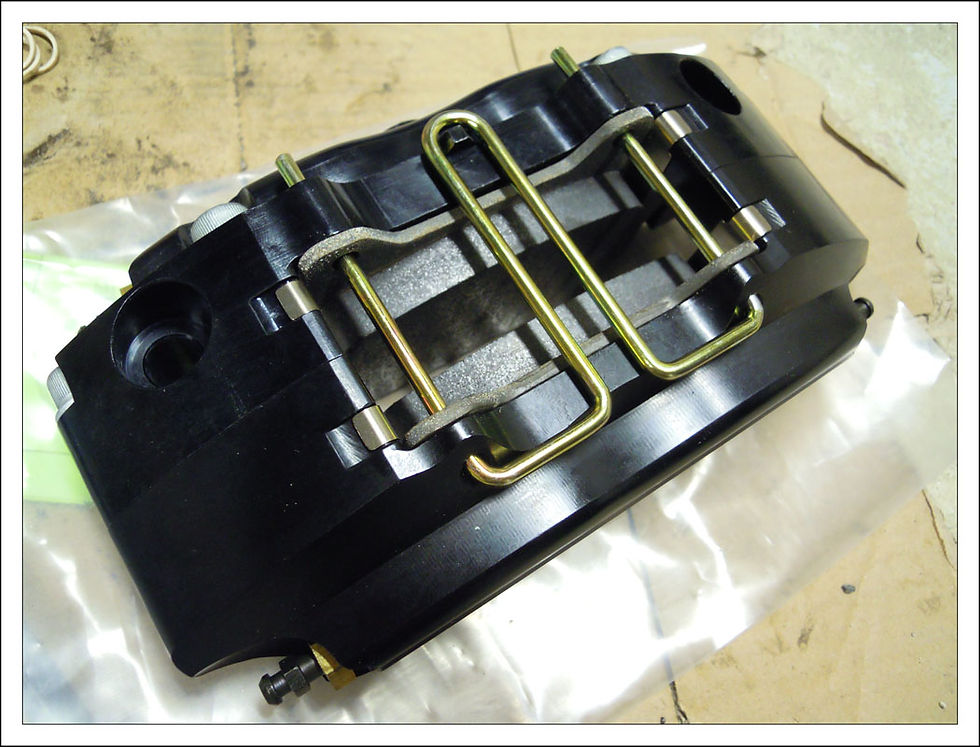
Freins avant et arrière Wilwood
Vanne hydraulique pour frein à main
Ailes avant & arrière look Carbon
Barre anti roulis avant & arrière°
Tableau de bord look carbon
Diffuseur arrière
Quick Rack
Durites avia
Aero screen carbon
2nd Delivery
Moteur HAYABUSA 1340cm3
Carter sec SBD pour Hayabusa
Recepteur hydraulique d'embrayage
Reprog pour passage de vitesse à la volée
Digidash

MAY 2013
A bit busy with other stuff but started to define the spec for the car we wanted to build. We’d decided without much discussion on a track only usage – making life a little simpler, with a dry-sumped Hayabusa engine, LSD, stick gear change (seems more natural when using the clutch).
APRIL 2013

14th April, a fine Sunday afternoon I had a trip to a track at Clastres where Carmaislight (the French agent for MK) had a couple of cars in action. I took up the offer of a few laps as a passenger, the first acceleration coming out of the pits was violent & coming in to the first corner I was convinced that we were going too fast and would be going straight on. To my relief we made it round… easily, and I was well and truly bitten by the bug. An MK Indy RR with a Hyabussa engine – that’ll do nicely.
Besides Carmaislight have got to be a decent bunch of chaps – they named their company after Carmelite or (Karmeliet), not the religious order but the beer !
MARCH 2013
When Jeremy suggested doing a build together I thought it was a great idea though I was a little worried about him being a “frog” – cars built by frogs do not have the best reputation for reliability! It was also a strange coincidence as back in January I’d picked up a copy of Comple Kit Car magazine and it was still hanging around the house – I’d been rather taken by a Dax Rush with a BMW M3 engine.
I’d never heard of MK and wasn’t familiar with cars using bike engines either so whenJeremy first mentioned it I was thinking more along the lines of Westfield and Ford or Vauxhall power but I had a pretty open mind. Jeremy had already seen MKs at track days so I arranged to meet up with their French agent to have a look.
I liked the idea of building, not so much from a price point of view, but for the personal satisfaction. Besides buying a car ready built is just shopping, and I’ll leave that to my wife.


A little about me & my motoring history
I started driving round fields in Land Rovers and Ford Escort vans even a Hillman Minx, my first car was an Austin Princess 2200, followed by Triumph Dolomite 1850,Citroen 2CV, a couple of Triumph Dolomite Sprints (neither standard), Peugeot 205GTI, Peugot 306, Alfa Romeo 147, BMW 335i (my mid-life crisis alternative to ameno-porsche).
My mechanic experience was gained mostly on the Triumphs & largely outof economic necessity. I guess I learned some useful stuff in my engineering apprenticeship too.
My motor sport experience is limited to a few slalom sprint events with the Sprints. I’d thought about kit car builds before but never fancied it on my own especially being based in France since 1997. There isn’t so much car culture here, nor the suppliers that go with it – it doesn’t seem to go much further than Halfords style (if that’s not an oxymoron) accessories.
